How To Videos and PDF Instructions


Indexing/Clocking video
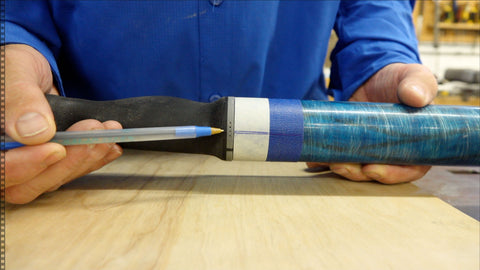
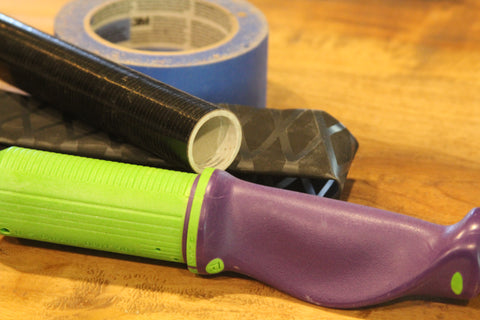
In this short video, we will show you how to properly index/clock your GG oar handle. This is a very important process. These directions must be followed or your hands will not be in the correct ergonomic position during your stroke. All/any play or slop must be rotated out to find the top dead center for your indexing/clocking marks. Be sure to leave on the masking tape with the line on it until the glue is fully dried. That way you can make sure it hasn't moved out of alignment. If your grips are uncomfortable during a stroke it is most likely due to misalignment during this process. Note: Do not hit, bang, or pound on the GG during this process. The GG should slip in without the use of tools. Edge oars offsets their button on the side of the oar blade. The button is located on side of the oar shaft, not on the top. This means your indexing/clocking mark will not line up with the button on Edge oars. Please make sure that you have the oar blade oriented in the correct position for left and right. Your indexing/clocking mark will line up with the top of the blade, not the button.

Handle Installation Spray 90 video
In this 2 minute video, we will cover how to glue your GG oar handle into any composite oar shaft. We recommend using 3M spray 90 adhesive.
Be mindful of where your overspray is going.

Oar Handle Removal video 1
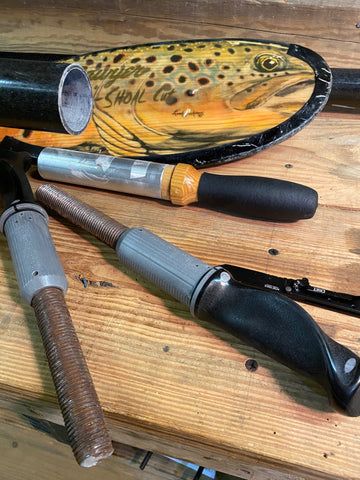
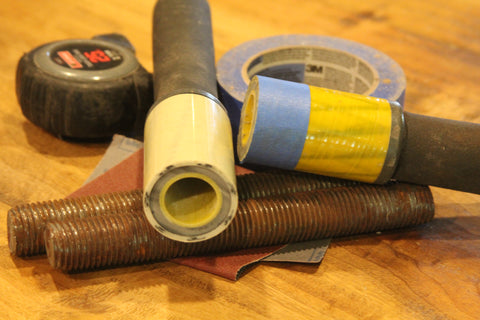
In this video, we will show you how to remove the factory handles from your existing composite oars. This method will work with most composite oars. For Sawyer, you do not need to remove the foam plug the handles will come out in about 5 blows. You can use a 1.375" to 1.5" diameter steel slug in any length over 5". Cataract oar handles can be very difficult or imposable to remove with this method. Some Cataract handles have come out relatively easy and some we could not remove with this method. For Cataract oars, we recommend that you saw 3-3/4" of the oar shaft off to remove the factory grip. Note: DO NOT REMOVE ANY LESS THAN 3-3/4" from the grip end of the oar if there is a factory counterbalance or you will saw into the steel counterbalance rod. WEAR SAFETY GLASSES AND DO NOT SAW INTO THE STEEL ROD. Pro-Loks oar handles are part of the oar shaft and must be sawn off. The tool used to remove the foam plug consists of an adjustable length paint roller handle, a screw on end fitting with a screw glued into the end. These items can be purchased at the local hardware store for around $15. See the oar brand specific PDF instructions in the nodes below for your brand of oars.

Counterbalance Installation video
In this one minute video we will show you how to install your GG counterbalance. The counterbalance is a steel all thread rod cut and fit to your GG. This will bring the weight of your GG to 2lbs. 13 oz. The rod will be rusty but this will not affect the performance. Place the rod in a bench vice or have a friend hold onto it with channel locks or a pipe wrench. The rod should be screwed all the way in until it bottoms out, hand tight with no more than 5-1/2" sticking out past the grip. Note: do not hold onto your GG with any tools. Do not put your GG in a bench vice.

Carbon Fiber Installation video
This 1-minute video will cover how to adjust the fit of the cylinder of your GG oar handle for all carbon fiber oars, including Sawyer Smoker Bandit, Edge oars and Pro-Loks oars. The process used to manufacture these carbon fiber oar shafts gives them a smaller ID (interior diameter) so your GG will require sanding down the cylinder to achieve a proper fit before installing. We recommend having someone hold the GG for you during this sanding process. The fit should be snug but allow for the GG to slide all the way in the oar shaft before applying the adhesive. Note: Do not hit, bang, or pound on the GG during this process. The bench vice in this video is for showing the sanding process only. If you use a vice or tools you will damage the TPE (molded rubber) on the GG. Have someone hold the grip for you during the process. We could not get a clear shot in the video with someone holding the GG so we used a vice only to get a clear view. You can clearly see the GG is loose in the vice.

Cataract handle removal non-counterbalanced video
In this 3:43 min video a Gilman Grips customer will show you how to remove a Cataract non-counterbalanced oar handle without removing any length from your oar shaft. This will require some tools and shop experience.

Promotional Video
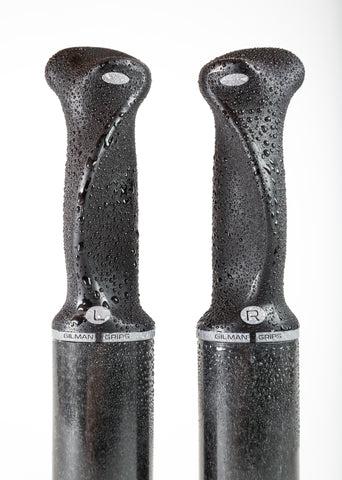
In this 2.5 minute video, we will show you Gilman Grips in use and explain the product. Gilman Grips are designed for maximum performance, comfort, and control. Never miss a stroke.
;)
Counterbalance Installation PDF
In this PDF we will walk you through installing your counterbalance. Be sure to screw the allthread all the way into the Grip. When screwed in all the way only 5-1/2" of the all thread will remain sticking out.sdfasdlfmasdlknv'adsgfqadsofnal'ksdnvasd'vjnlkadjsvkansdk'vnlkasndvklnasldknvklansdlkvnaklsdnvlkasndvlknaklsdvnlkadsnvlknasdvklnsdv
;)
Indexing/Clocking PDF
In this PDF we will walk you through Indexing/Clocking you Gilman Grips oar handles. This is an important step and these directions must be followed to index the Grip in the correct ergonomic position.
;)
Snug fit installation PDF
In this PDF we will walk you through the snug fit installation process. This process will work for a snug fit on any brand oar. Please note that the process and adhesives used are different for for a loose fit.
;)
Loose fit installation PDF
In this PDF we will walk you through the loose fit installation process. Please note that the process and adhesives used are different for different brand oars and for a snug fit.

;)
Sawyer 1-5/8" installation PDF
In this PDF we will walk you through installing your Gilman Grips in a standard 1-5/8" diameter Sawyer oar.
;)
Sawyer 1-3/4" large damiter installation
In this PDF we will walk you through installing your Gilman Grips into a LD large diameter 1-3/4 outfitters oar.

;)
Sawyer 1-3/8" small diameter SST installation
Coming soon.
;)
Cataract installation PDF
In this PDF we will walk you through installing Gilman Grips on your Cataract brand oars. It can be difficult to remove a Cataract oar handle using the method we use on other oars, so we recommend you saw off the old grip. This will shorten your oar length by 3-3/4" however most of our customers say they prefer the improved safety and performance of the Gilman Grips and do not notice the slightly shorter oar length. If you do not want your oars to be any shorter you can switch to a Sawyer brand blade and gain back the length because the Sawyer blades are longer than Cataract baldes.
;)
Carbon Fiber oar installation PDF
In this PDF we will walk you through installing Gilman Grips on your carbon fiber oars. These instructions should be followed for for both Sawyer Smoker Bandits and Edge oar installations.
;)
Pro-Loks instalation PDF
In this PDF we will walk you through installing Gilman Grips on Pro-Loks oars. Please note this is a different process than used on other carbon fiber oars.